 I don't know how many parts this guide will be in total but I will try to cover as much of the game as possible to get new FoW gamers up to speed with the basics. You may have read my review of the Flames of War rules already and picked up interest for the game. The next step would be getting models, books and whatever else you need to get started.
...................................................................................

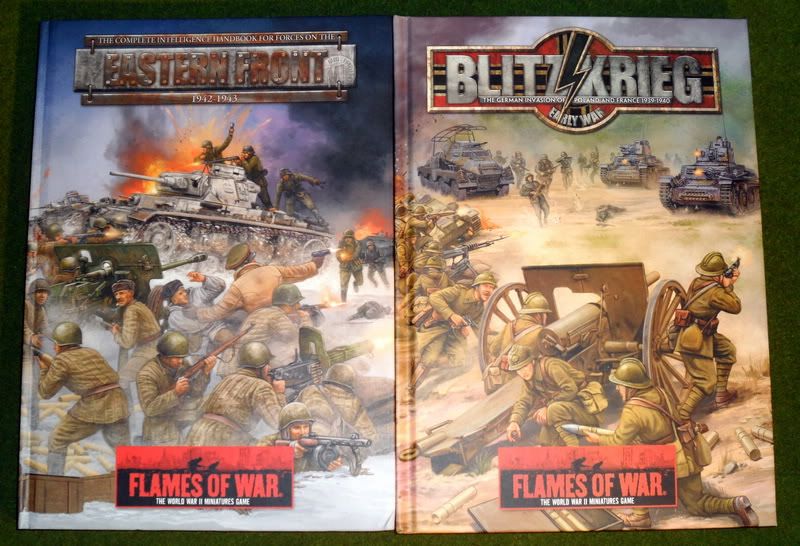
 Books, the most important part of the game. And where you might easily get lost. There are many choices to be made starting out with Flames of War. What army are you interested in? What timeline? What frontline? All those questions are closely tied to the source books.
The main rulebook, both the hardback and the pocket version from the "Open Fire" starter set covers all the rules to play the game. But it has no army lists as the idea for this game is to split the war into 3 periods. Early / Mid / Late war. Your gut reaction may be "urrgh....", mine was too. But, this split helps with the balance and makes everyone playing it "keep up" with the timeline so that you won't meet a 1944 Panther company with a 1939 rifle company. How fun would that game be, apart from being a anachronistic freakshow?
As I mentioned in my review, the ideal situation would be you trying out each of the 3 available periods to see which one suits your playing style and taste the most. Do you want tank armies or focus on infantry, powerful tanks or paper thin armored vehicles? Rules that make tanks unreliable or rules that have tank aces and superior technology?
 When you know what period you want to play, you look at the sourcebooks available. These books focus on 1 period or 1 campaign/operation each. For the most part these books only contain army organization lists and sometimes special rules and scenarios. But they are all used together with the main rulebook. Some choices are easier than others. Mid and Late War have numerous books that focus on both the eastern and western front. While Early War is confined to one single volume that focus on the western front. I will use the Early War book for reference as it is the period I've chosen to play
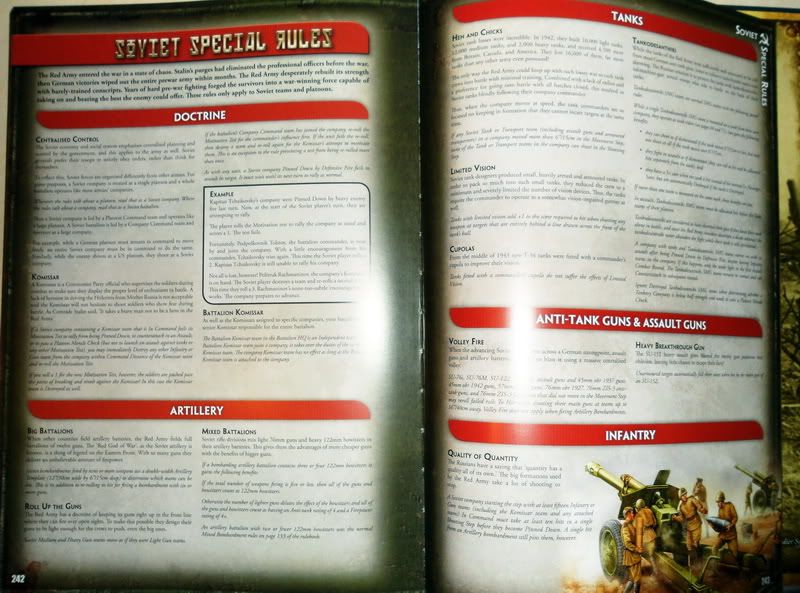 Each book contains information on how to build a force that took part in the fighting. Ostfront, which is a Mid-war source book contains the information on how to build most armies fighting on the eastern front. From the Finns, Germans and their allies like Hungary and Romania to the Soviet armies. Books like Ostfront or Blitzkrieg have a "general" approach. The campaign books are more narrow in scope and only focus on the force taking part in a single battle or campaign.
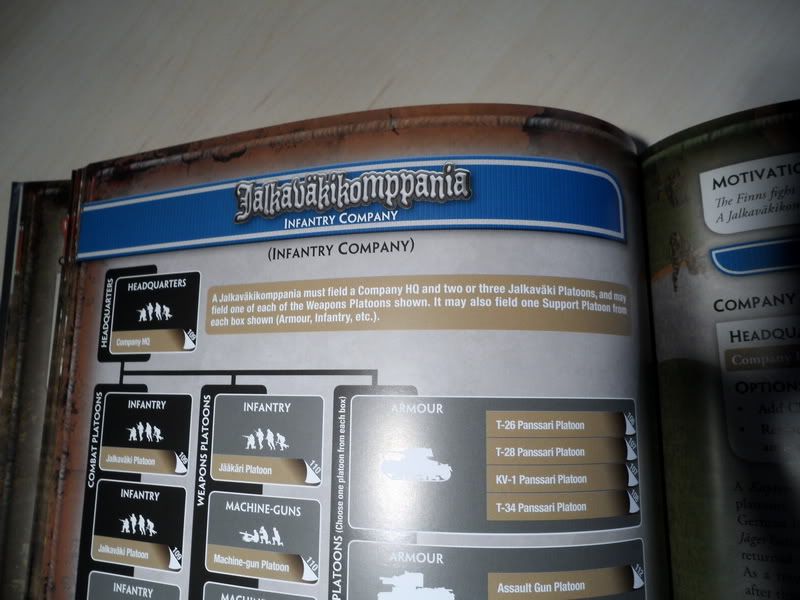
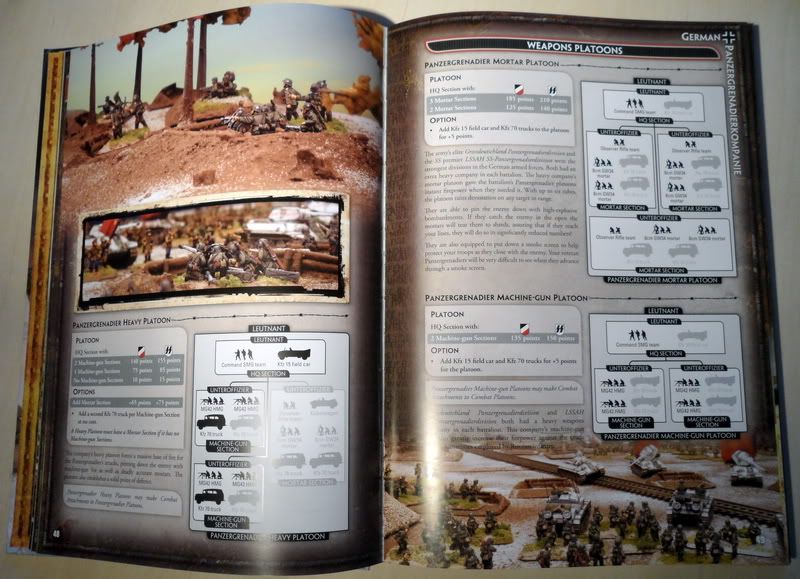
So you pick a book about your area of interest, then you pick an army. The choices do not end here however. As each nation have a plethora of forces that vary in composition and playstyle. Most armies have a couple of infantry formations for you to pick from, each being build around a historical background. The backbone is always set in stone but you may also add additional units not originally part of a company - this is called "divisional support". Infantry companies may add tanks and artillery or even air support this way.
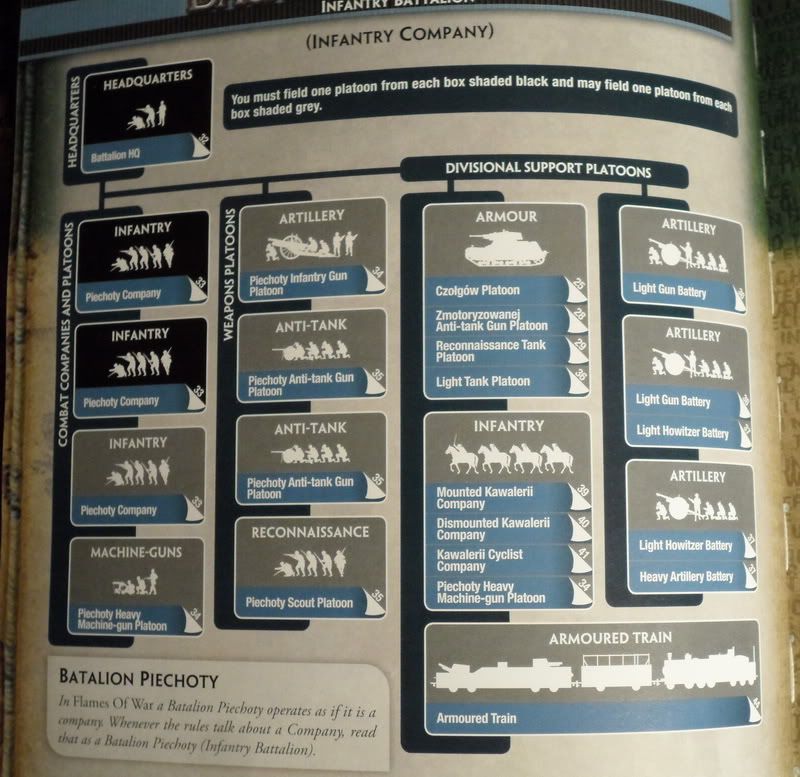
To build an army in flames of war you take the army of your choice and look at their force organization chart. Black boxes mean that the units HAVE to be included. Grey boxes are choice options.
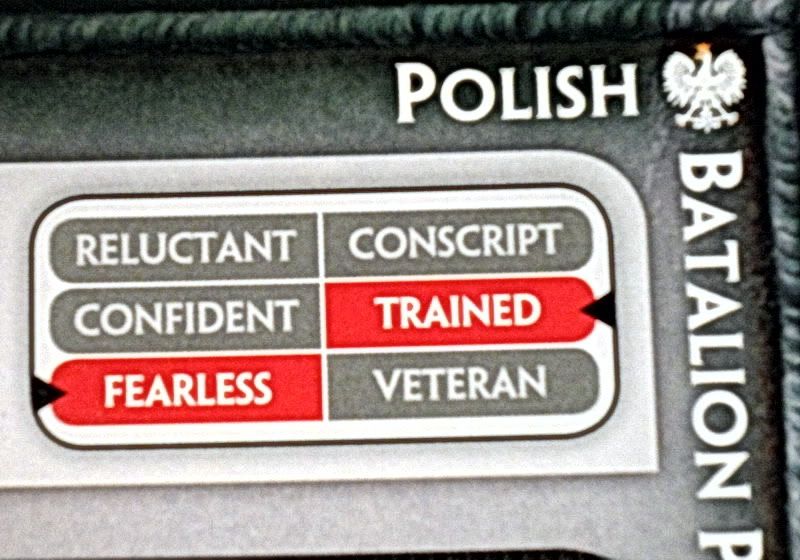
Each army also have additional data such as the Training and Morale.
Each nation also have special rules (doctrines)of their own to make them stand out from other nations and play differently. These are really important to remember when you play!
.................................................................
Army building
 As mentioned your choice of army comes with a army organization chart. Black boxes are mandatory to include and grey boxes are optional. But, even in your mandatory options you have room for decisions. You can make your units full strength or weak. Starting out with the game won't have you sport 2 full infantry companies with 3 platoons each, you might start out with 2 weak companies with 1 platoon each just to fill the necessary choices to get a game going.
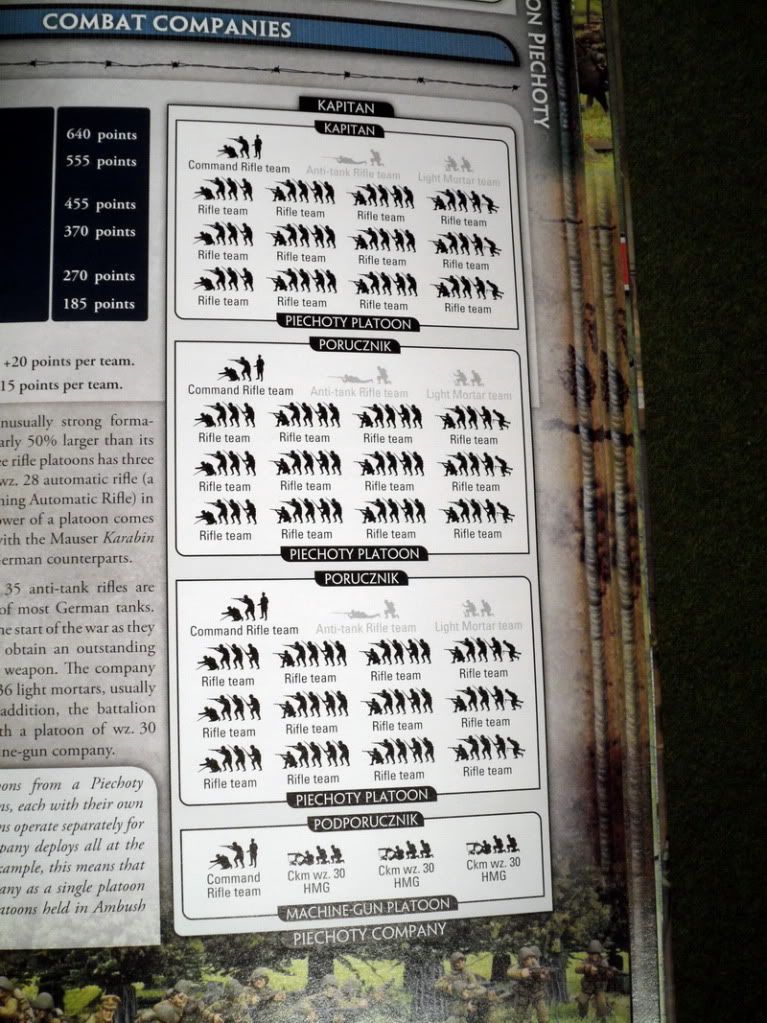
Each unit is always listed at various strengths in the unit roster. There will always be a minimum and a maximum points value of the weakest and strongest possible version of each unit/platoon/company. You will often have lots of values in between. The Polish infantry battalion for instance requires you to field 2 companies of infantry. Each company has to be 1-3 platoons strong. When building a company you have a list of what stuff will cost you if you have a single platoon, a single platoon with a HMG platoon attachment, 2 platoons + hmg attachment and 3 platoons with hmg attachment etc.
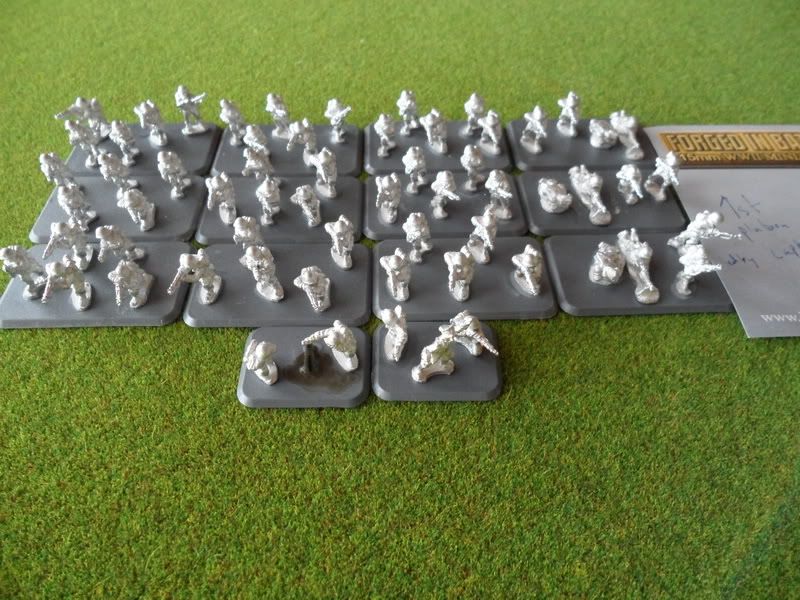
Each platoon also comes with mandatory and optional units. Just as before the mandatory are marked in black and the optional are grey. The Polish infantry platoon has to be made up of 12 rifle teams, 1 command team and may be upgraded with a light mortar and a anti tank rifle team as well.
....................................................
 Assembling and basing your models
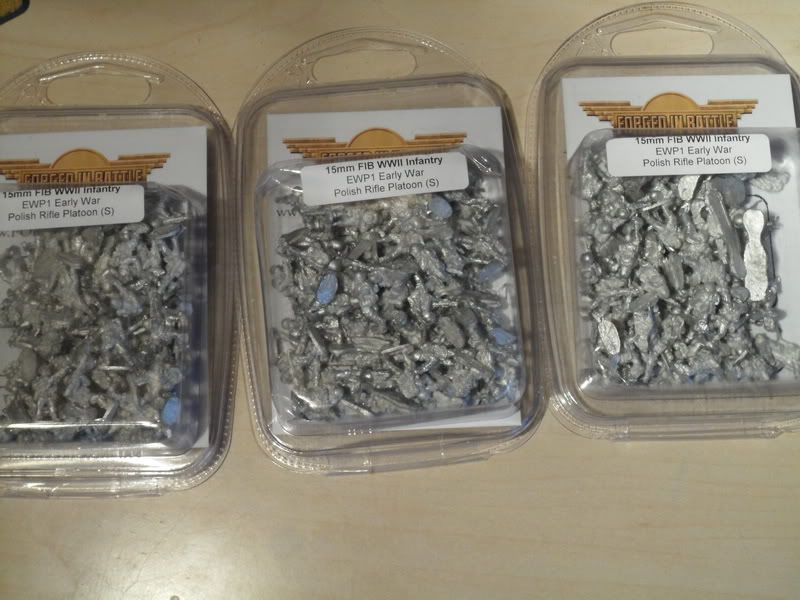
 Having looked in the source book you settle for an army. I would advice on actually getting the source book first before starting to order units blindly. This will allow you to minimize unnecessary purchases or units that simply aren't compatible with the army you have chosen to play.
It should be noted that units for any nation in Early/Mid/Late war most of the time are fully compatible with multiple armies within the same book. So if you start out with an infantry army, you can use that infantry in support to a tank army and vice versa. Keep in mind though, that models may not be compatible across the period timeline.
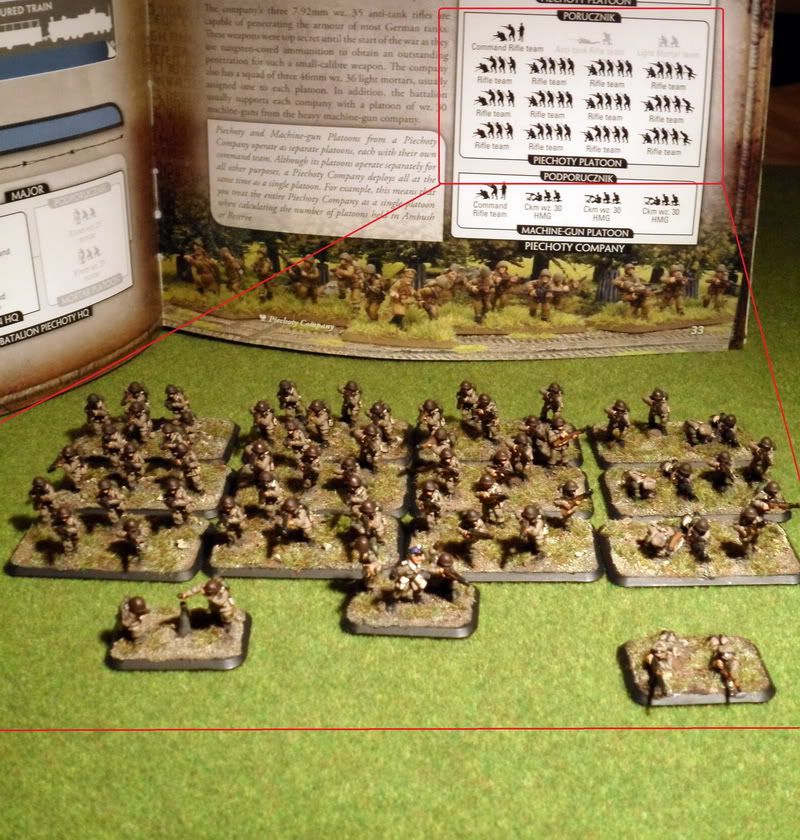
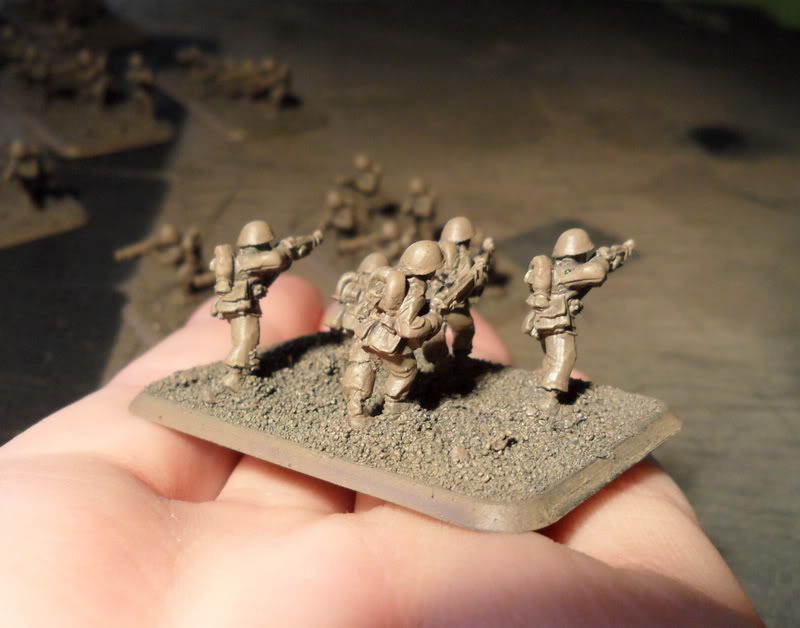
When your models arrive, it is easily to get overwhelmed once again, 15mm is a tiny scale if you are used to 28mm. My advice is to open each unit box and start sorting the models into units and teams the way they are described in the sourcebooks. This will allow you to separate platoons, make sure you have all the models you need and all the parts that are required for tanks and artillery.
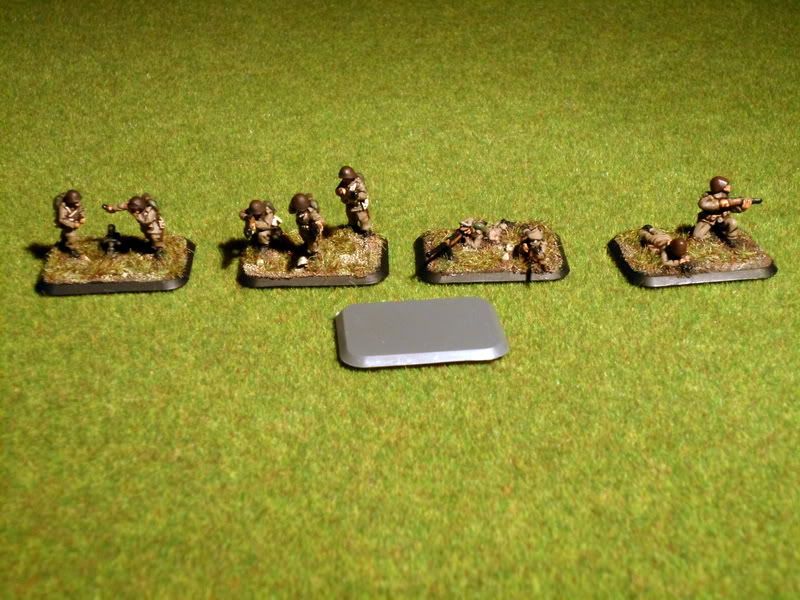
The silhouettes in the sourcebook will show what kind of composition each team in a platoon will have. 5 silhouettes = 5 models.
Some people prefer to reduce that number to 4 which is perfectly fine as single infantry models themselves don't have any impact on the rules - you use the unit type of teams to determine the effects.
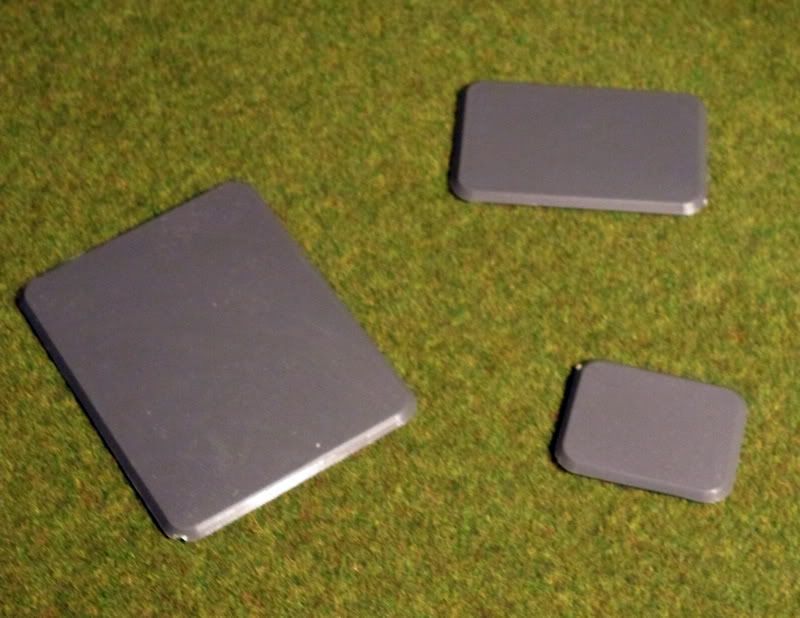
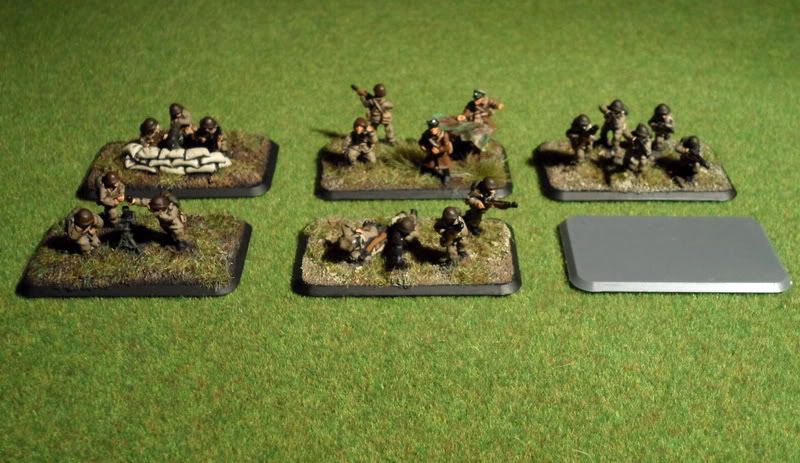
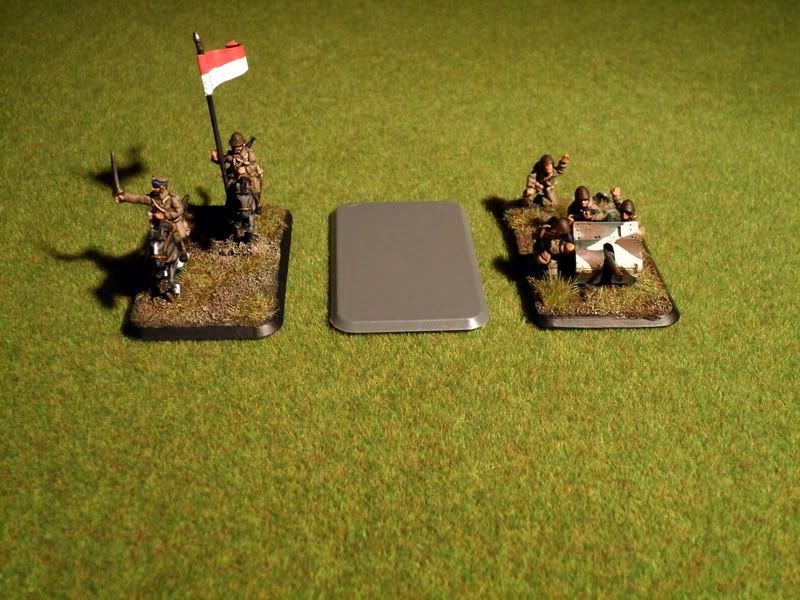
The books will also contain a bit of information on HOW to base your models. I myself thought that it was still a bit unclear so I've included pictures of all the teams I could think off and how you should base them and on what kind of bases.
Small bases are used for teams of 1-3 models. Usually your command teams, small weapon teams such as light mortars and spotters for artillery.
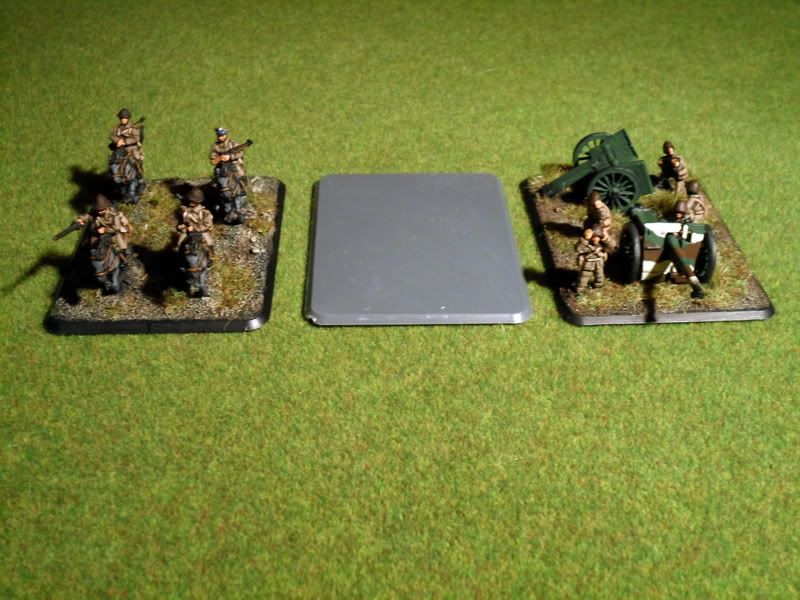
Medium bases are used for almost everything else. Rifle teams, larger and heavier weapon teams such as medium mortars, machine guns but also cavalry command and small anti tank guns.
Large bases are almost exclusively used for heavy artillery. But cavalry teams also use this type of base.
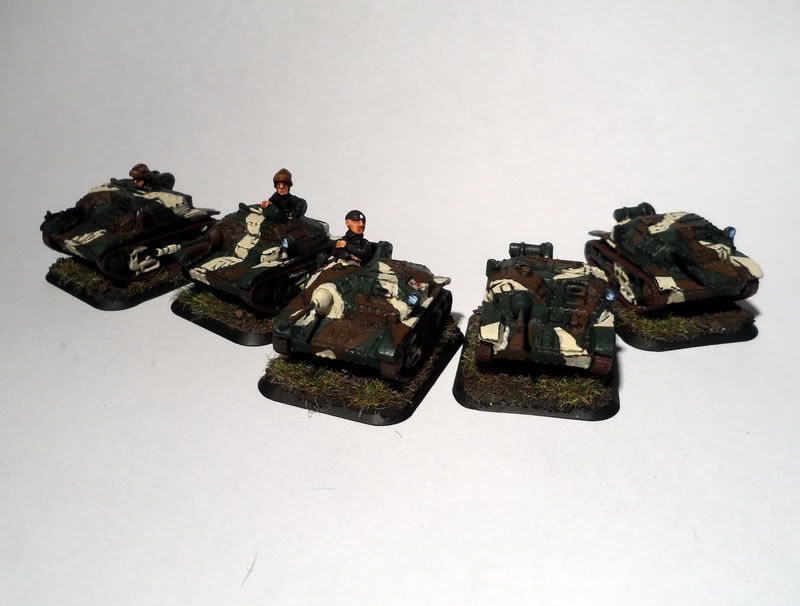
You can if you want base your vehicles. This is purely down to your taste. Larger vehicles may not need basing, but I find that small fiddly vehicles such as the Polish armored cars and tankettes are much easier to pick up and move around if they are based. Put them either on a Battlefront base or make your own out of thin plasticard sheets. If you don't want to waste small bases you can cut medium bases in half and trim the edges.


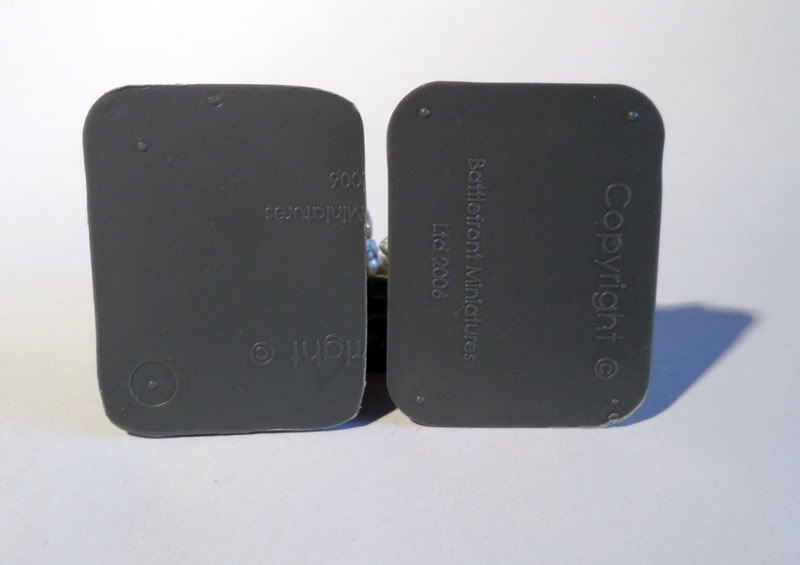
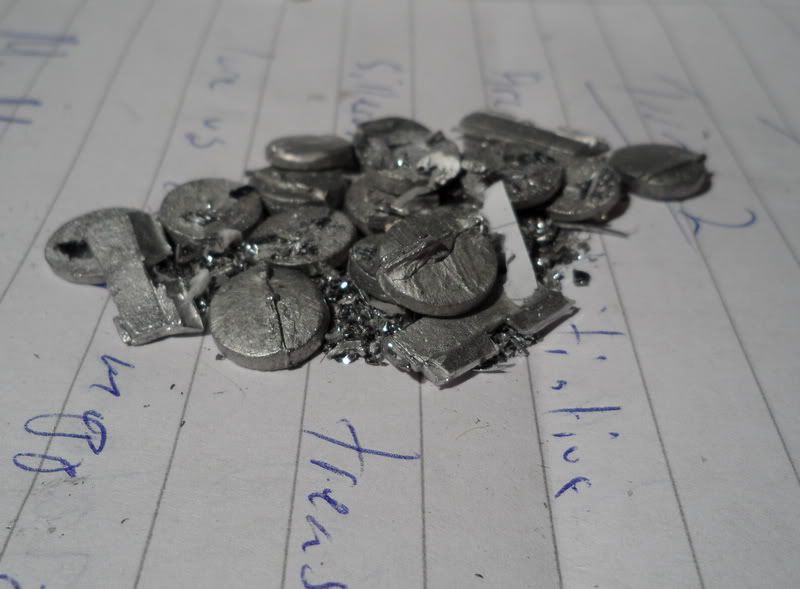

 Depending on what manufacturer you buy your models from they may come with either thin, thick or very thick molded bases. You are left with 3 options. Ignore it and let each soldier stand on a small hill as you cover the base with sand. Trim the base or cut it off completely and glue the soldiers feet straight onto their base. Or cover the top of the base in plaster or similar material to make the surface area level up to the height of the molded base.
I'm an impatient person when it comes to such things, and don't want to mess around with more things than necessary doing bases. I have a mix of Battlefront, Forged in Battle and True North infantry. And the FiB and TN have thin enough bases to be covered with sand straight away imo. The BF models do not, I started trimming them, but then came to the conclusion that I might as well cut off the molded base and glue the models straight to the plastic base. So my BF stuff is 50% trimmed and 50% without molded bases.
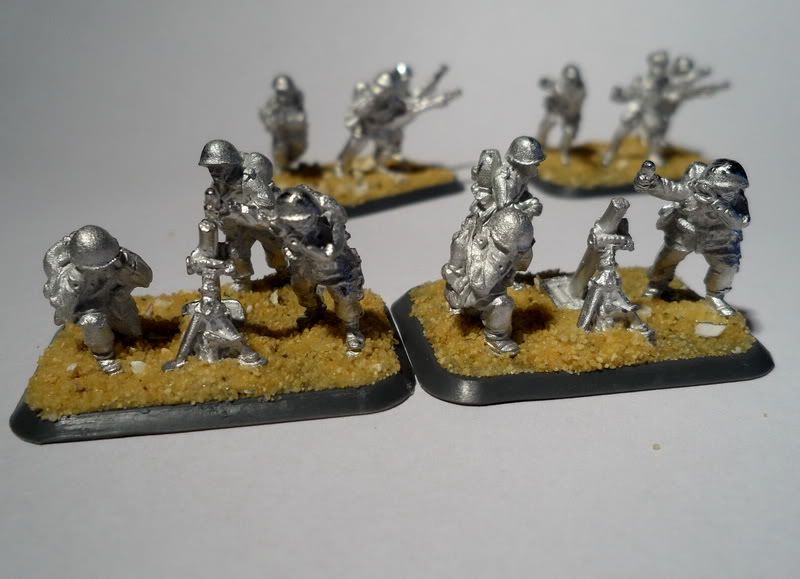
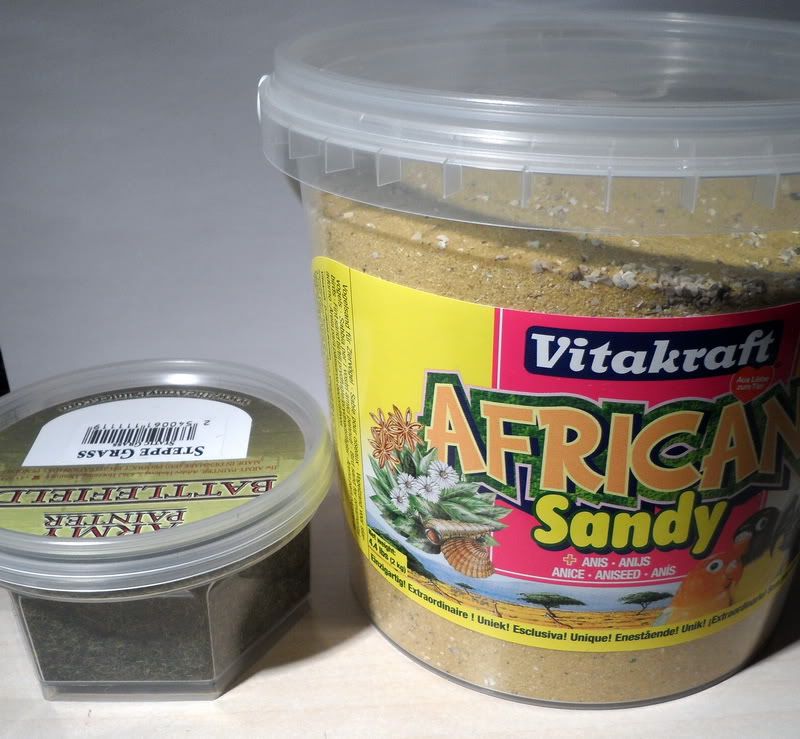
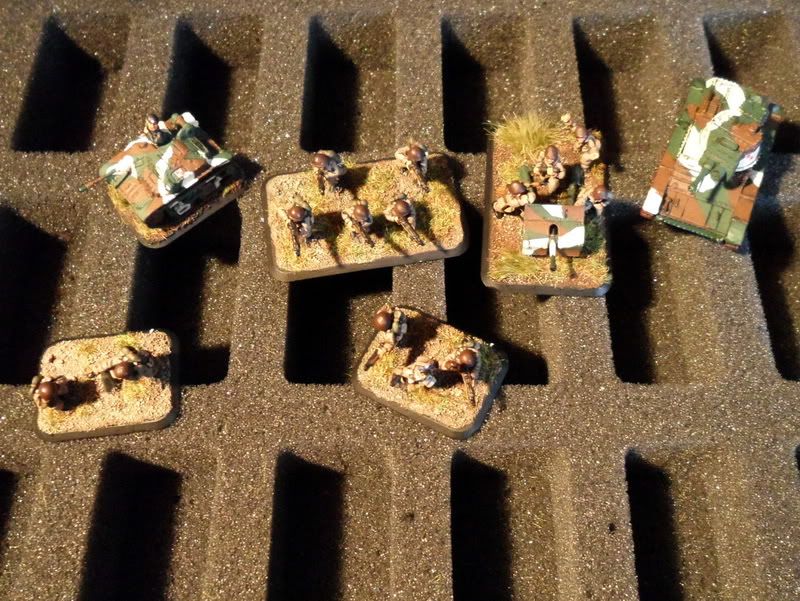
I bought a bucked of bird sand from a pet shop, it was a bargain, 2kg for about 7 dollars/50SEK. The sand is glued onto the base with regular PVA glue.
In the beginning I was worried about the static grass I had, that it would be the wrong size and look silly. But you regular static grass used for 28mm stuff works just fine. I also "pimped" some of the bases with silflor/tufts.

....................................................
Painting
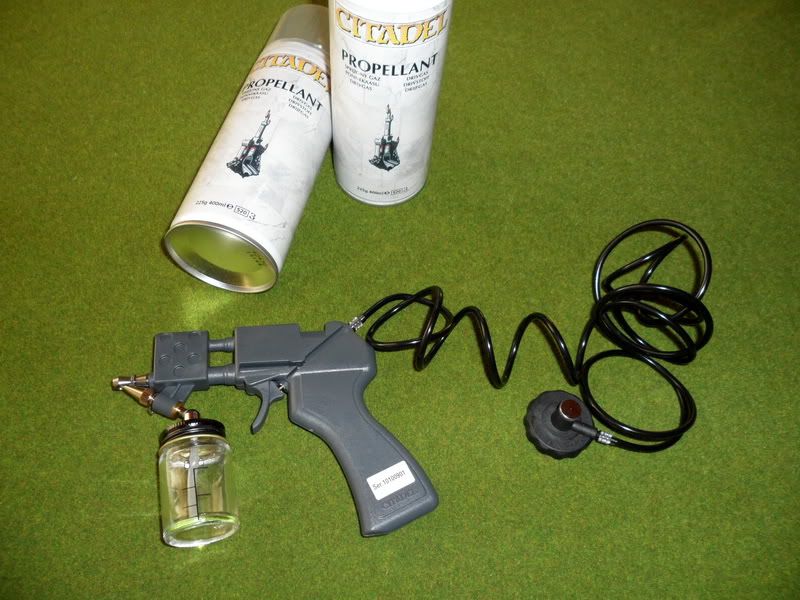
 I won't go into detail as I will post links at the very bottom of this article leading to a few of my guides to give you an idea of how painting 15mm works. But I would advice on getting either an airbrush, a can of the basecoat color of your army or a GW spray gun.
You will still undercoat with black/white primer, but having a thin layer of you basecoat applied by spraying it on instead of brushing it on will save you HOURS!
If your basecoat is some weird variation that can't be found in a spraycan the cheap substitute to an airbrush is the GW spray gun which I use myself.
....................................................
Transporting your army
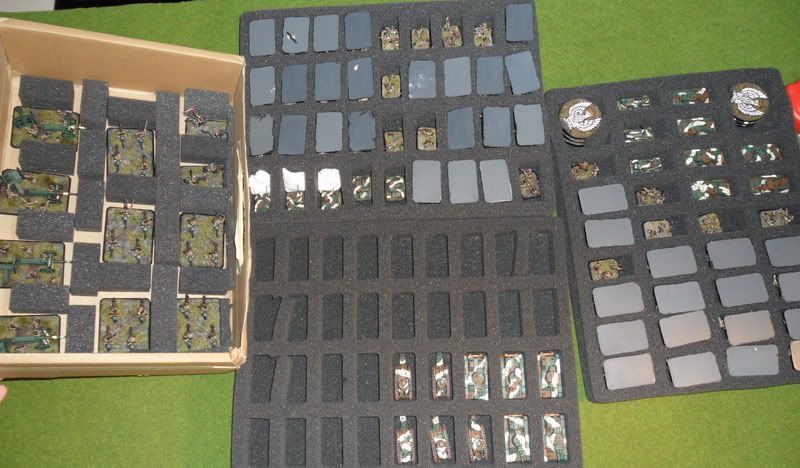
 Getting the books and models, paints and everything else is expensive enough. Getting a dedicated Flames of War army transport can be a bit too much early on. I'm not saying you won't want to get one as they are customized to accommodate all the unit types perfectly.
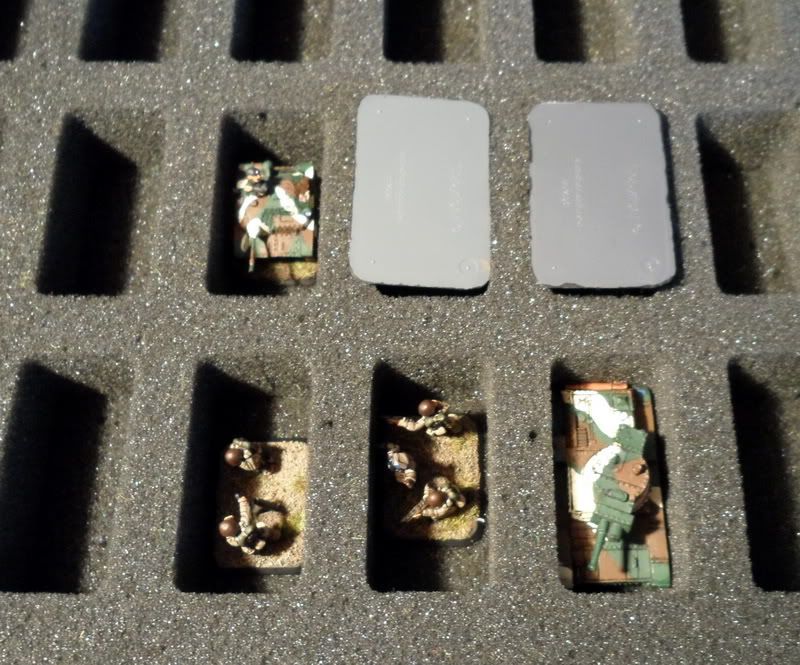
What you can to in order to cut a few corners is to transport most of your stuff in a regular 28mm army case. Tanks are no problem for the most of it, and infantry teams and small anti tank guns can be fitted into your 28mm slots if you simply put them upside down. Should not be a problem at all even with infantry teams that are 5 models per base.
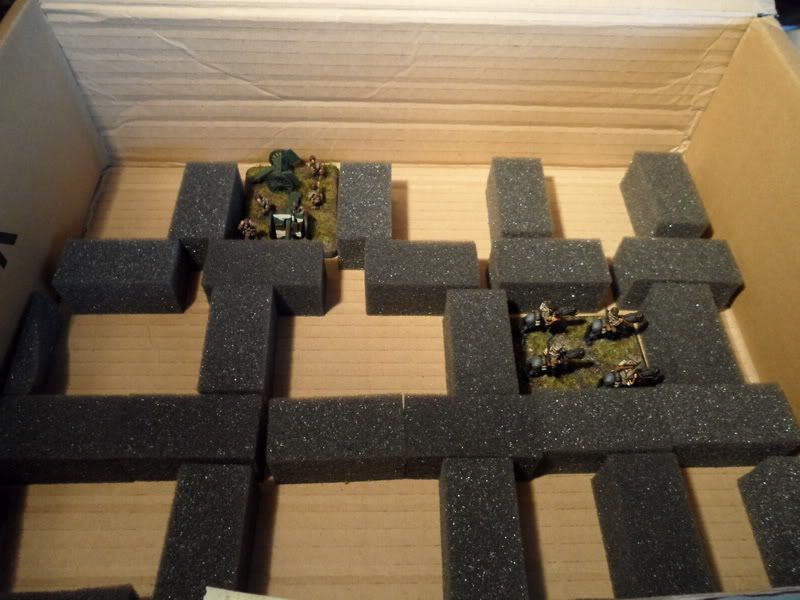
For models that don't fit into your 28mm case you can custom build a transport box cheaply by using leftover inserts. I had a feldherr army case which came with inserts that had to be removed. I save the inserts and glued them into a cardboard box, making spaces that would fit my cavalry and artillery teams. The drawback of this is of course, the box can only be transported vertically. But this is often enough.

LINKS OF INTEREST
Review of the Flames of War rulebook
Review of the GW spray gun
Army Tokens
Grass tufts
Painting guide infantry
Painting guide tanks
Painting guide cavalry
....................................
Part two will be posted next week and include the basics of the gameplay.
No comments:
Post a Comment