 Originally intended for the WSS magazine but I was unaware of their policy of only publishing previously unseen painted work (which makes sense), but which also instantly ruled out anything I could contribute with on a painting level. It would be ridiculously hard for me to sit on something like this for 2-3 months without showing it. So instead I'm making this a regular blog post so not to waste anything. Hope you guys enjoy it and find it useful.
The 1992 Last of the Mohicans movie featuring Daniel Day Lewis was the main reason I discovered the French & Indian War conflict and sparked a great interest in the period of the Seven Year War. I really liked the small scale, dominated by skirmishes and infantry units fighting in the North American wild. You have European regular infantry in their bright and shiny colors fighting alongside militia and native American tribes. What’s there not to like? So when Warlord Games acquired Conquest Miniatures and their whole catalogue I immediately took a second look on the “Last of the Mohicans” blister, figuring it would make a great addition to my Musket & Tomahawks games.
The blister contains 6 miniatures, and basically allthe main characters of the movie with Hawkeye, Chingachgook, Uncas, Alice and Cora Munro and Magua. The only one missing is the English Major Duncan Heyward.
In any case, I was set on painting the blister contents to look as close to how the characters look in the movie. Luckily I had the movie on DVD so I could freeze frame it whenever I needed reference pictures for colors on clothes and details.
This tutorial will not cover every single detail but focus on major aspects of each character.
Let’s begin.
Paints listed below are from the following manufacturer of paints Vallejo Game Color (V), Citadel (C), Army Painter Warpaints (A). I matt varnished all models using The Army Painter “Anti-Shine” bottled brush on varnish.
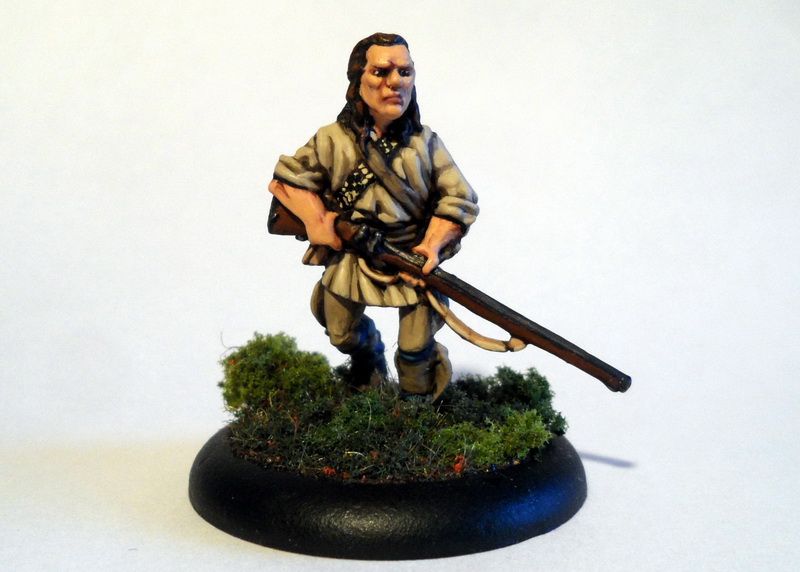
Hawkeye shirt
Colors used: (V) Khaki, (V) Bonewhite, (V) Charred Brown
Hawkeye is the character with the least colorful attire; luckily I really like the soft tones of khaki, light brown etc. The shirt which is the main focal point was base coated Charred Brown. I then began adding increasing amounts of Khaki and painted the shirt in several layers until the paint used was pure Khaki. Once I reached this point I began mixing Khaki with Bonewhite until I was satisfied with the tone, the final layer was a 50-50 mix of Khaki and Bonewhite. I like working with these colors as they are relatively easy to achieve a “soft look” with.
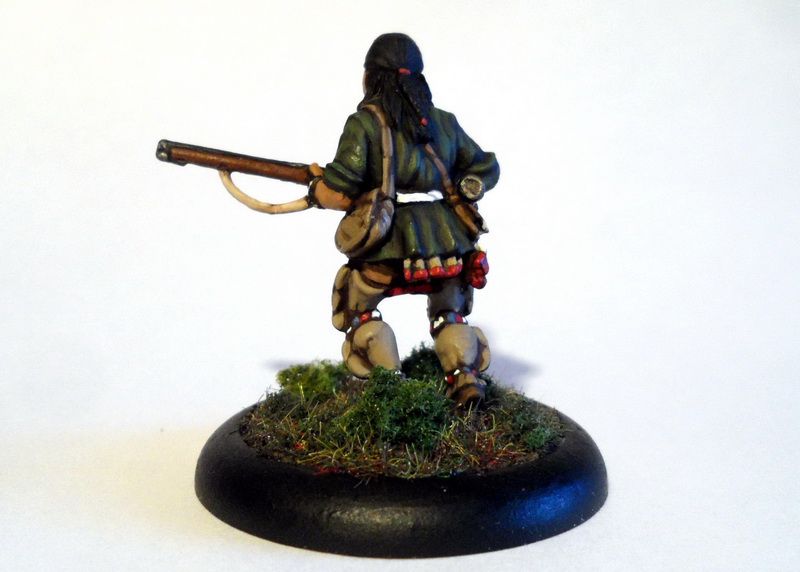
Uncas shirt
Colors used:
(C) Caliban Green, (C) Steel Legion Drab, (C) Averland Sunset, (A) Soft Tone ink, (A) Strong Tone ink, (V) Charred brown.
Uncas was a bit more tricky, his shirts change during the movie, I settled for the dark green one he wears during the large Huron ambush on the British following the battle at fort William Henry. The basecoat of the shirt was a 50-50 mix of Charrec Brown and Caliban Green. This was followed by a wash of Strong Tone. I then mixed Charred Brown with Caliban Green and Steel Legion Drab, the ratio of paint was 30-40-30 in the order they are mentioned. This layer was used to roughly mark all the future highlights and shadows. The next layer was made up of a mix of Charred Brown, Caliban Green, Steel Legion Drab and Averland Sunset – equal amounts of each paint.
This was followed by another wash, this time Soft Tone Ink was used. And finally the last layer was a mix of equal amounts of Caliban Green, Steel Legion Drab and Yellow. This final layer was used to highlight everything one last time but I kept much of the darkened tone and shadows from the wash intact.
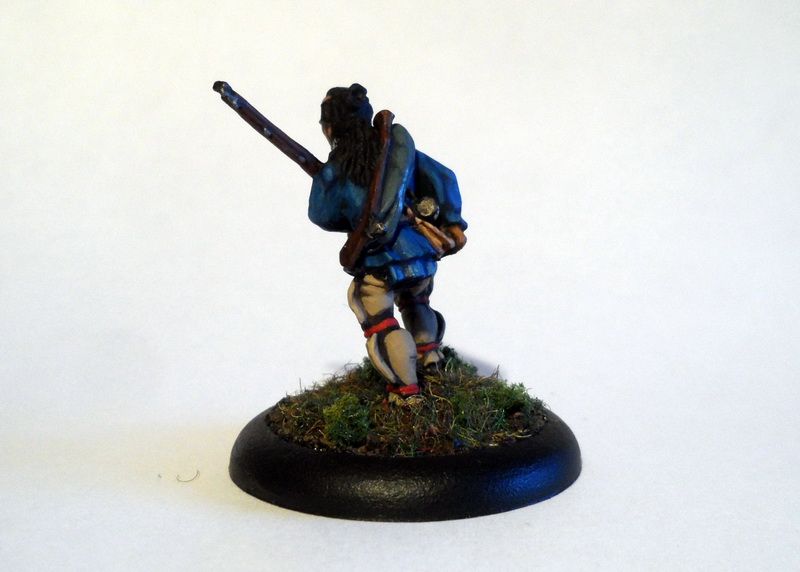
Chingachgook shirt
Colors used: (V) Black, (V) Imperial blue, (V) Stonewall grey
Chingachgook’s shirt was not that difficult to paint, though I really wanted it to have highlights that weren’t “baby blue” in tone – something you get when you mix white or bonewhite with blue colors. That is why mainly two colors were used, Imperial Blue and Stonewall grey.
The basecoat was painted using Black and Imperial blue, the ratio should be 50-50. Follow up with another coat of pure Imperial blue, leaving the darkest of shadows intact. From this point and onwards I painted several layers with a mix of Imperial blue with increasing amounts of Stonewall Grey in it. Begin at a 80-20 ratio in favor of Imperial blue and work your way towards a mix that ends up being 60-40 in favor of Imperial Blue. The highlights should be visible but be discreet. They will become more clear once you matt varnish the miniature as well.
Leggings (Uncas, Hawkeye, Chingachgook)
Colors used: (V) Charred Brown, (A) Stong Tone Ink, (C) Khemri Brown [OOP!], (V) Khaki
The leggings for the three heroes were painted a bit differently from Magua’s since they had different colors in the movie. You will notice that Khemri Brown is used in this tutorial, this is a now out of production paint and the closest thing Citadel is manufacturing these days is Steel Legion Drab which is a poor match. I would instead suggest using Vallejo which has a paint with an almost identical color (though I cannot remember the name).
Basecoat the leggings with Charred brown and wash them with Strong Tone ink. Now mix equal parts of Charred Brown and Khemri Brown for a second layer. Add more Khemri brown into the mix for a third layer. This is the foundation of your paintjob and should provide the basic shading. Next I used Charred Brown mixed with Khaki (40-60 ratio), one layer, then another layer with increased amounts of Khaki (20-80 ratio). Final layer should be pure Khaki for the last couple of highlights.
Musket/Rifles
Colors used: (V) Charred Brown, (V) Bestial Brown, (V) Black, (C) Boltgun metal, (C) Baal Red wash [OOP], (A) Soft Tone Ink, (A) Dark Tone.
I opted for a simple paintjob on the rifles, the wood was base coated Charred Brown then coated with Bestial Brown. I wanted to have a darkened polished wood finish so I gave the wooden parts two washes of Baal Red and Soft Tone Ink (30-70 ratio). Metal parts were base coated black, painted Boltgun metal and washed with Dark Tone. I went over a few details with Boltgun metal again, but left the metal areas mostly alone after the wash. The Baal Red wash is an old Citadel wash, you can use any other wash that you think will fit, just something to give a slightly red tint to the final product.
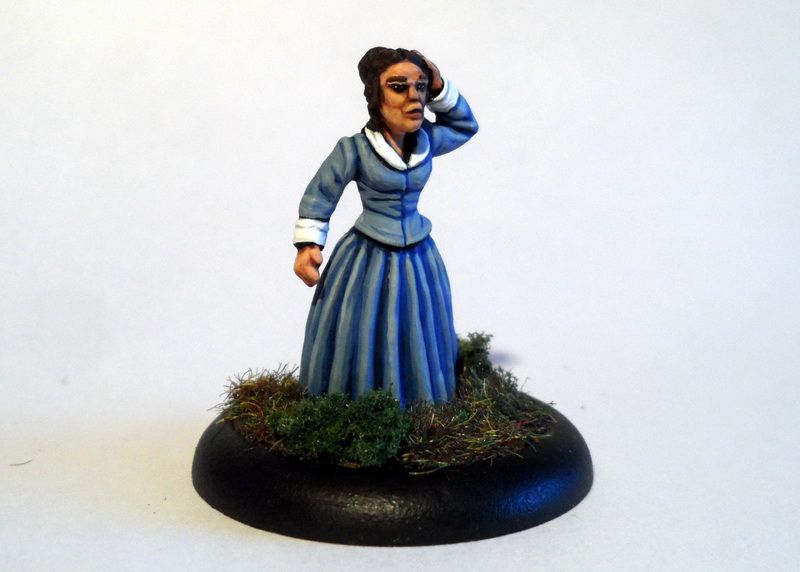
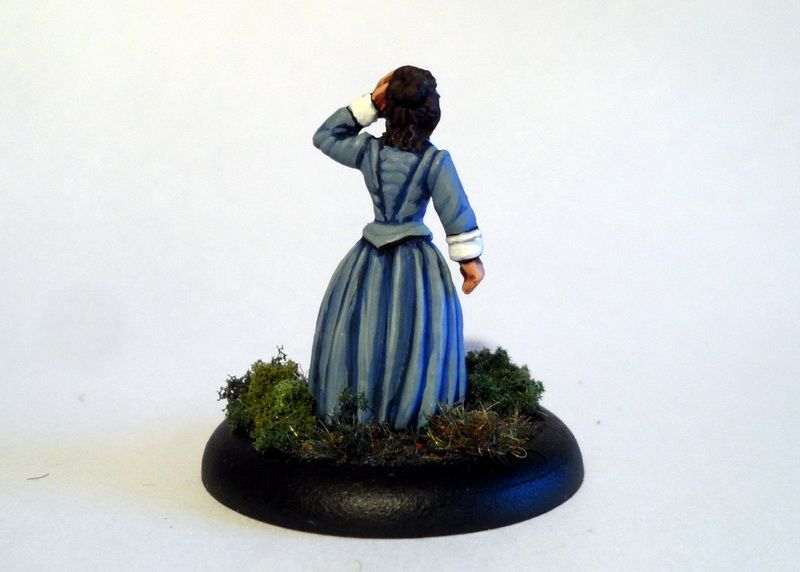
Cora Munro’s blue dress
Colors used: (V) Imperial Blue, (V)Ultramarine blue, (V) Bonewhite, (V) Stonewall grey)
Cora’s dress is blue, and goes towards a baby blue, bleached blue and even grayish blue tone. To achieve this look I began with undercoating the entire dress with Imperial blue. The following coat was Imperial Blue mixed with equal part Ultramarine blue. The next layer was an equal mix of Ultramarine Blue and Bonewhite. This made up the foundation of the dark colors and shadows of the dress. From here on I used a mix of Ultramarine Blue and Stonewall grey, starting at a 50-50 ratio which increased in favor of Stonewall Grey to 10-90 ratio towards the very end a couple of layers later. To get a soft final highlight I used a 10-90 mix of Ultramarine Blue and Bonewhite. This layer was very thing almost like a glaze.
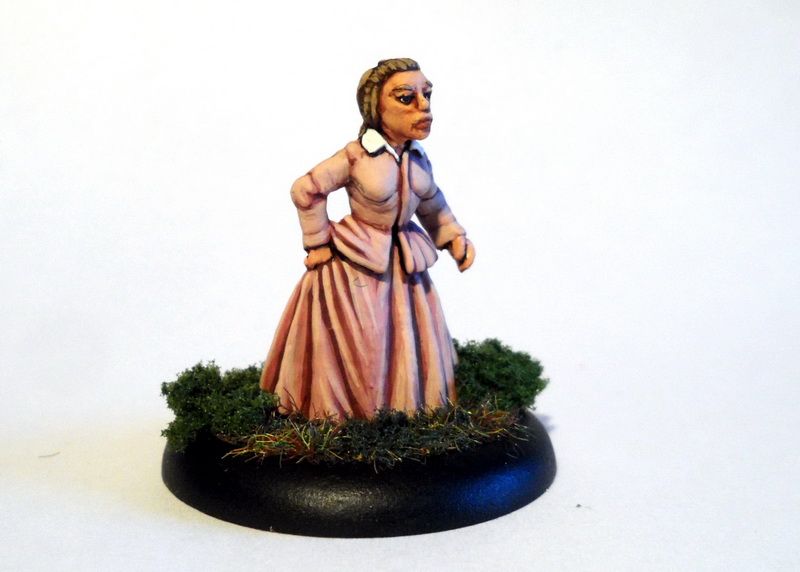
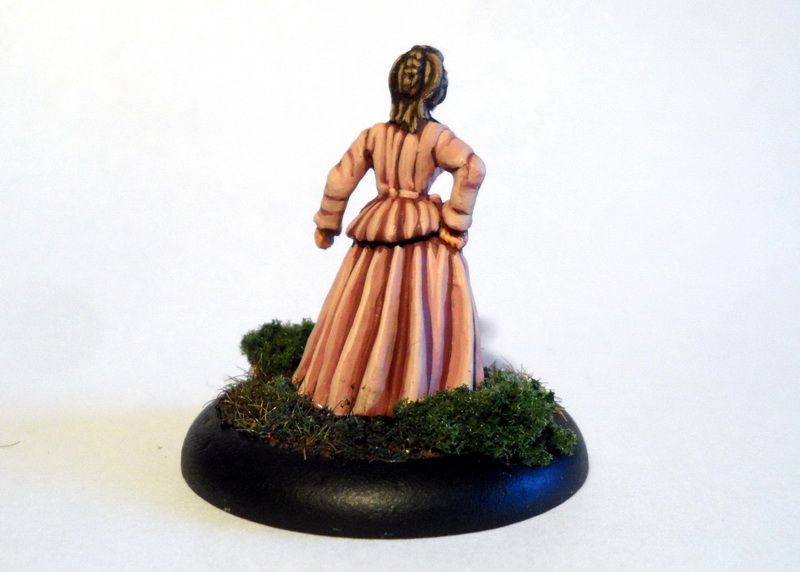
Alice Munro’s pink dress
Colors used: (V) Scarlett Red, (V) Bonewhite, (V) Scorched Brown
Painting Alice dress was a lot more fun than painting Cora’s blue one. Perhaps because I don’t paint pink very often so I got to experiment a bit to get the right tone on shades and highlights. It was also a fairly easy recipe consisting of only 3 colors. The basecoat for the dress was made up of a mix of equal parts Scarlett Red and Scorched Brown. For the remainder of the dress I used a mix of Scarlett Brown, Scorched Brown and Bonewhite – starting layer having an equal amount of each color. The next 4-5 layers had increasing amounts of Bonewhite added to the mix until I was satisfied with the tone of the dress. The final highlight was a glaze made up of almost pure Bonewhite but with a tiny bit of my “pink color mix” in it.
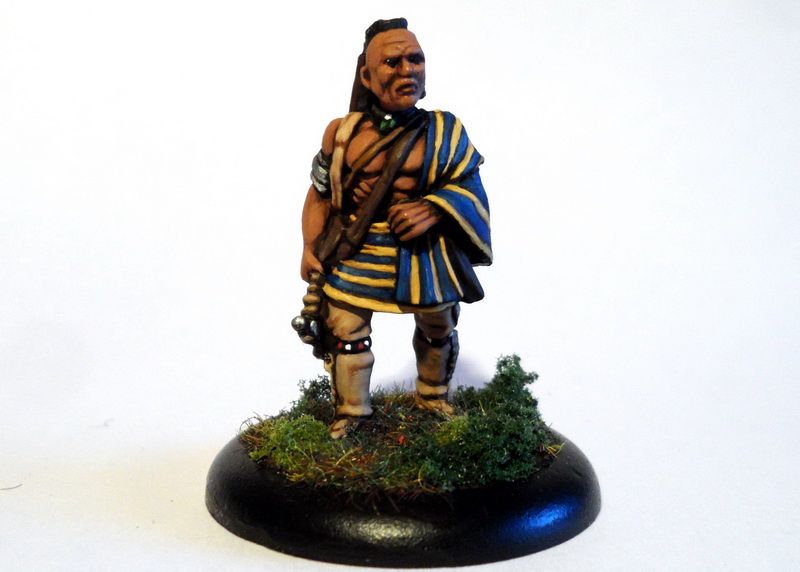
Indian flesh (focus on Magua)
Colors used: (V) Charred Brown, (V) Tan, (V) Dwarf Skin, (V) Elf skintone, (C) Averland sunset, (A) Strong Tone ink, (A) Soft Tone ink.
The Indian flesh recipe will focus on Mague, but I will add notes on how Uncas and Chingachgook were painted as well towards the end.
Basecoat the skin with Charred brown, and then a layer of Charred Brown mixed with Tan (75-25 ratio). Wash the flesh with Strong Tone Ink. Follow up by a mix of Charred Brown and Tan at 60-40 ratio, increased to 40-60 ratio in the next layer. Muscles and facial features should already have been marked and had their basic highlights painted by this point. Wash the flesh areas with Soft Tone Ink before proceeding to the step which is mixing Charred Brown, Tan and Averlund Sunset at a 50-20-30 ratio. This mix should be relatively thin and applied smoothly to all muscles and facial features to highlight them even further.
A final layer of flesh was painted with a very thin mix made up of equal parts Charred Brown, Tan, Dwarf Skin and Averlund Sunset – this should be almost like a glaze, and better to have two semi transparent layers than one too thick at this point.
Indian lips are painted Tan and then darkened with Strong Tone ink.
Uncas and Chingachgook were painted fairly similar, but I wanted their skin to differ in tone from Magua’s. While Magua appears more bronzed I wanted these two to be a bit more pale. Basically these two follow the same steps used for Magua, with the difference of me adding a second layer of Soft Tone ink over the end result and follow that up with a mix of equal amounts Charred Brown, Dwarf Flesh, Elf Skintone and Averlund Sunset.
Woodland basing materials: Army Painter "Steppe Grass", this is a dark green blend with a bit of brown and red in it. I also use "Summer 3 color clump foliage" and "Flock Blend Dark Conifer" both of these manufactured by GaleForce9.




No comments:
Post a Comment